Create Stage 2 (TEM3P)
1. New Stage
To add a second stage to the project, go to the ACE3P menu and select the Add Stage… item to open the dialog for specifying the new stage. In the dialog, set the Mesh field to Import New Mesh File. For the Mesh File field, we are going to use the RfGunBody.gen file from the ACE3P code workshops. You can download a copy of this file from the ModelBuilder for ACE3P Data Folder.
For a more detailed description of adding a stage to a project, refer to Create Stage 2 (Track3P).

2. Modules Tab
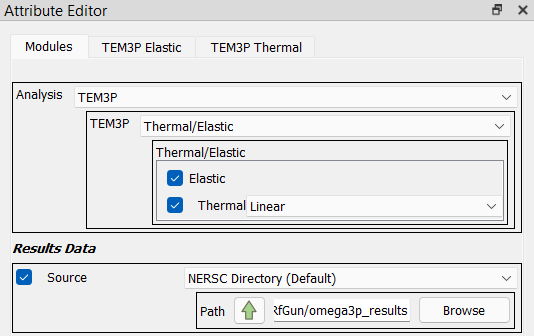
To set up the analysis, select the Modules tab and set the Analysis to TEM3P. For the TEM3P type, select Thermal/Elastic, and then check both checkboxes for Elastic and Thermal. Next to the Thermal checkbox, select Linear from the drop-down menu.
Below that, check the Source checkbox to display a new input field for the path to the EM field data to use. Click the up-arrow button next to the Path label to open a dialog listing jobs run for the first stage. In the dialog, select the one row in the list for Omega3P job previously, then click the Select button. For a more detailed description, refer back to the Window example (Modules Tab section).