Specify Track3P Analysis (part 1)
Next, we will specify the analysis parameters for the second (Track3P) stage in the Attribute Editor. In the Analysis Stages panel, make sure the Track3P stage is selected.
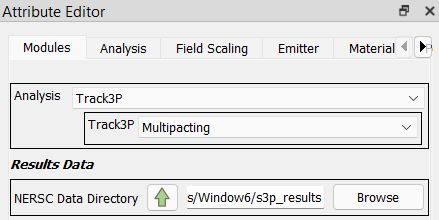
1. Set the Modules Tab to Track3P/Multipacting
In the Attribute Editor panel, select the Modules tab, and in that tab set the Analysis to Track3P, and then set the Track3P field to Multipacting.
2. Set the S3P Results Data Path
Below that is a field labeled NERSC Data Directory. This is for specifying the EM data that Track3P will use to compute particle trajectories. For this example, we are going to set it to the S3P results computed in the first project stage. To do that, click the up-arrow button next to the NERSC Data Directory label.

Modelbuilder will open a dialog listing all jobs from previous project stages. In this case, there is one row in the list, the S3P job you ran previously. Select that row and then click the Select button.

Modelbuilder will close the dialog and enter the path to the results directory for the selected job.
Note
In practice, you can enter any EM results data computed by ACE3P for the Window.ncdf mesh, whether done as part of a modelbuilder project or not. The Browse button is provided to let you navigate to paths outside the current project.