Specify Track3P Analysis (part 2)
Continue specifying the rest of the Track3P simulation.
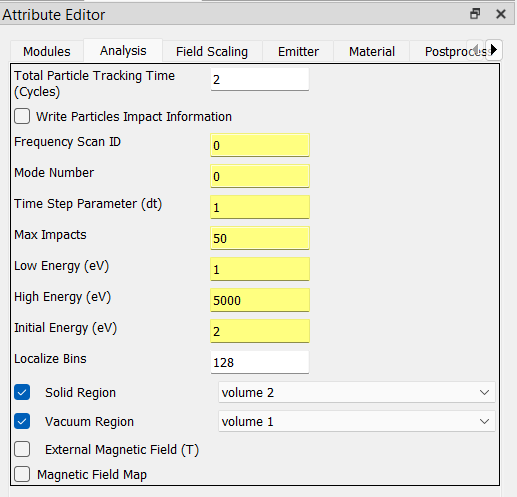
3. Analysis Tab
Input the following parameters:
In the Total Particle Tracking Time field, enter
2.In the Localize Bins field, enter
128.Check the Solid Region checkbox, and select
volume 2from the drop-down list.Check the Vacuum Region checkbox, and select
volume 1from the drop-down list.
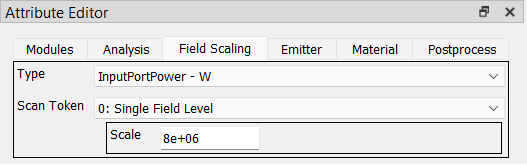
4. Field Scaling Tab
Input the following parameters:
Set Type to
InputPortPower - W.Set Scan Token to
0: Single Field Level.In the Scale field, enter
8.0e6.
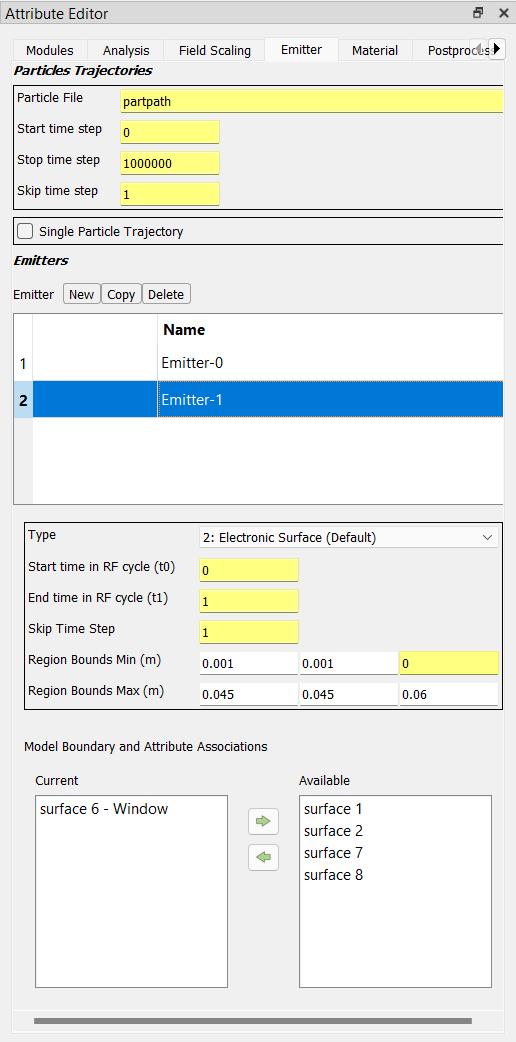
5. Emitter Tab
This tab has two sections labeled Particles Trajectories and Emitters, respectively. In the Emitters section, we will be creating two Emitter instances, both assigned to surface number 6.
Create the first Emitter by clicking the New button. Set these parameters:
Set Type to
5: Solid Electronic Surface.Set the Region Bounds Min (m) parameters to:
0.00.0-0.002.Set the Region Bounds Max (m) parameters to:
0.0450.0450.0.Assign
surface 6to the Current list at the bottom of the panel.
Create the second Emitter by clicking the New button and set its parameters as follows:
Set Type to
2: Electronic Surface.Set the Region Bounds Min (m) parameters to:
0.0010.0010.0.Set the Region Bounds Max (m) parameters to:
0.0450.0450.06.Assign
surface 6to the Current list at the bottom of the panel.
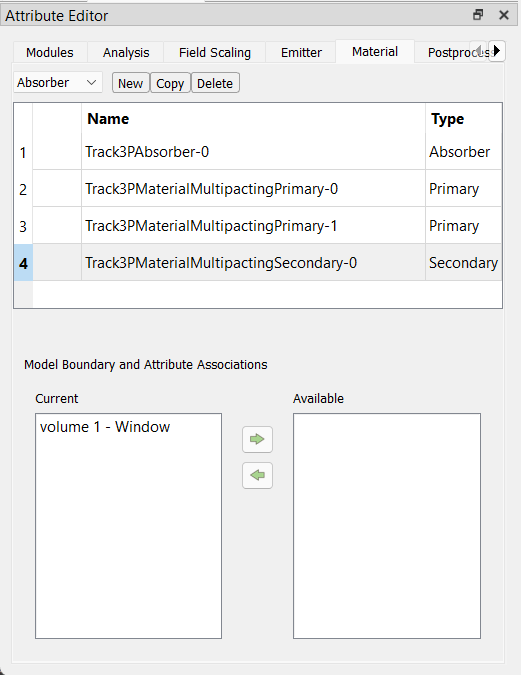
6. Material Tab
For this example, you will create four Material attributes. In the Material tab, to the left of the New button there is a drop-down control for selecting one of three material types: (i) Absorber, (ii) Primary, (iii) Secondary. To create each material, first select the type from the drop-down control, then press the New button.
The first material specifies surface number 6 as both a primary and secondary particle emitter.
Select Primary from the drop-down control, then click the New button.
Check the checkbox labeled Seconday (below the material list).
Below that, move
surface 6to the Current list.
The second material specifies the remaing surfaces as particle absorbers.
Select Absorber from the drop-down control, then click the New button.
Move
surface 1,surface 2,surface 7,surface 8to the Current list at the bottom of the panel.
Tip
You can select and move more than one option at a time in the Current and Available lists.
The third material specifes volume number 1 (cavity) as a secondary particle emitter.
Select Secondary from the drop-down control, then click the New button.
Move
volume 1to the Current list at the bottom of the panel.
The fourth material specifies volume number 2 (window) as a primary particle emitter.
Select Primary from the drop-down control, then click the New button.
Move
volume 2to the Current list at the bottom of the panel.