Specify S3P Analysis
In this stage, we will set up an S3P analysis for one frequency. All these steps will be performed in the Attribute Editor panel.
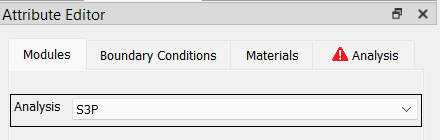
1. Select S3P for the Analysis in the Modules tab
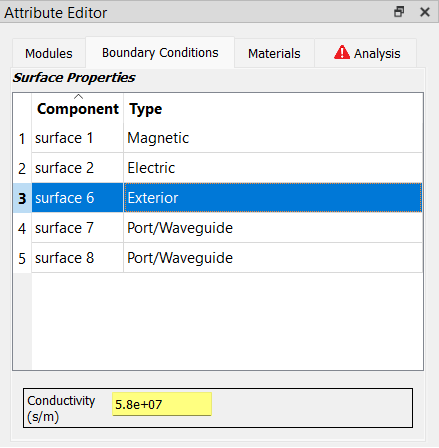
2. Specify the surface types in the Boundary Conditions tab
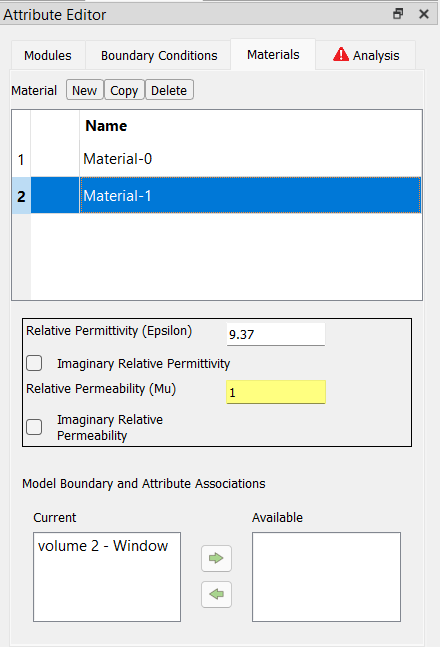
3. Specify material properties in the Materials tab
We are going to define material attributes for each of the two element blocks in the model The volume 1 element block represents the cavity geometry and volume 2 represents a window in the center of the cavity.
Click on the
Newbutton to create the first material attribute. Assign this to the first element block by clickingvolume 1in the Available list (at the bottom of the panel), and press the left arrow button to assign it to the first material. After clicking the arrow,volume 1should appear in the Current list (on the left-hand side). Forvolume 1we are using the default values for permittivity and permeability, so you we don’t need to edit those fields.)Click on the
Newbutton to create the second material attribute and assign this to the second element block by clickingvolume 2in the Available list using the left arrow button to move it to the Current list. Forvolume 2set the Relative Permittivity (Epsilon) to 9.37
Once finished, the panel should look like this:
4. Specify parameters in the Analysis tab
Set the Frequency Information Mode to Waveguide Frequency. Below that is a field Waveguide Frequency (Hz) for entering the frequency value; set it 2.856e9 as shown here:
